async='async' data-ad-client='ca-pub-1704385665578974' src='https://pagead2.googlesyndication.com/pagead/js/adsbygoogle.js'/> Welch House 1900

Featured Slider

Festive Outdoor Christmas Decorations


We don't normally decorate our yard for Christmas, but this year we decided to splurge and just go for it!

I wanted something magical and special and I knew Home Depot's giant 8ft Santa would do the trick!


And of course I couldn't forget his 8 tiny reindeer, plus Rudolph! They are also from Home Depot.


We have gotten so many compliments on this display! I love watching families drive by and seeing seeing them stop in front of the house so the kids can wave at Santa.


I am hoping that these guys will last for many years to come, as they were quite the investment! We are looking for a sleigh to add for next year.


I wish you all a safe and happy holiday! See you in the new Year!


-Larissa

Elegant Cranberry Holiday punch

 Have you ever struggled to find the perfect holiday beverage that would suit both young and old?

Well look no further! I think I may have found the perfect holiday punch!


My family requests this punch for every Thanksgiving and Christmas! The kids love it so much that sometimes I have to make two batches!

You will need only 5 ingredients:

-Cranberry juice ( I use diet)
-Ginger Ale (I use diet)
-Pineapple Juice
-Cranberries
-Limes

I choose to use diet ingredients and it tastes amazing, but feel free to use the regular stuff if you want!

I love how elegant this punch looks on a holiday table. You will feel so fancy when you serve it! At least I do!


I wish I could take credit for this delicious recipe, but I found it several years ago online.


You will find the full recipe here.  I hope you give this recipe a try for the holiday season! It looks so beautiful served in a wine glass and so easy to make!


-Larissa

An Old World Bejeweled Christmas Mantel

I have an old beautiful print of a young lady displayed on my mantel and she became the inspiration for my Christmas decorating this year.


The print reminded me of a young Marie Antoinette, so of course I had to bring out a pillow with her image on it.


My tree is new this year, it was gifted to me by King of Christmas. I think it is the nicest tree that I've ever 
owned, and the biggest! 


Apparently some of our pets were up for a photo shoot. Here is our black cat named "Little Girl" perched on the arm of the loveseat. Out of all of our pets she is the sweetest. If you are in need of snuggles, she's got you covered!


This little angel is our Pomeranian girl named "Ann Margaret". She is the sassiest girl ever! If I had known she was up for picture posing I would have dressed her in one of her dresses, but she is still adorable no matter what!


I love unique holiday items that are not easily found at box stores, so when I saw these gorgeous bejeweled trees by Martha Stewart at QVC I knew they would be perfect to go along with the lady print.


I love all things Martha Stewart, and she did not disappoint with theses trees!


The little Belsnickle Santa I found at a local shop last year. I've always wanted one, so maybe I will start a collection.


I had taken more photos but somehow I've lost them, but I still hope you enjoyed a peek at our Christmas this year. Do you have your Christmas decor up yet?

-Larissa

Adding old world charm to statues DIY

I adore statues. I feel like they lend a certain charm to a room.


I pick them up wherever I find them. Sometimes that's at thrift or antique stores, and other times I find them at Home Goods or even Hobby Lobby. Whenever I find them for a good price, I most likely bring them home.


I must say, I'm growing quite the collection, I think I have about 16 now. And with that growing collection comes many different shades of colors and bad paint jobs. I was so happy to come across Rox Van Del's  @houseofvandel reel on instagram not to long ago.


    She gave a short tutorial on how she painted her store bought bust to look more "aged". It was so easy and her statue turned out beautifully! I decided to try her technique out myself. 

All you need is these three items.

-Behr paint in "Basswood"

-Sherwin Williams paint "Egg White"

-coffee wash ( I used a watered down dark wax in "antique color")

The small statue below really needed a makeover, I found it for five dollars at a Goodwill store, the paint job was really bad, and it also had a strange flower decal all over it. 

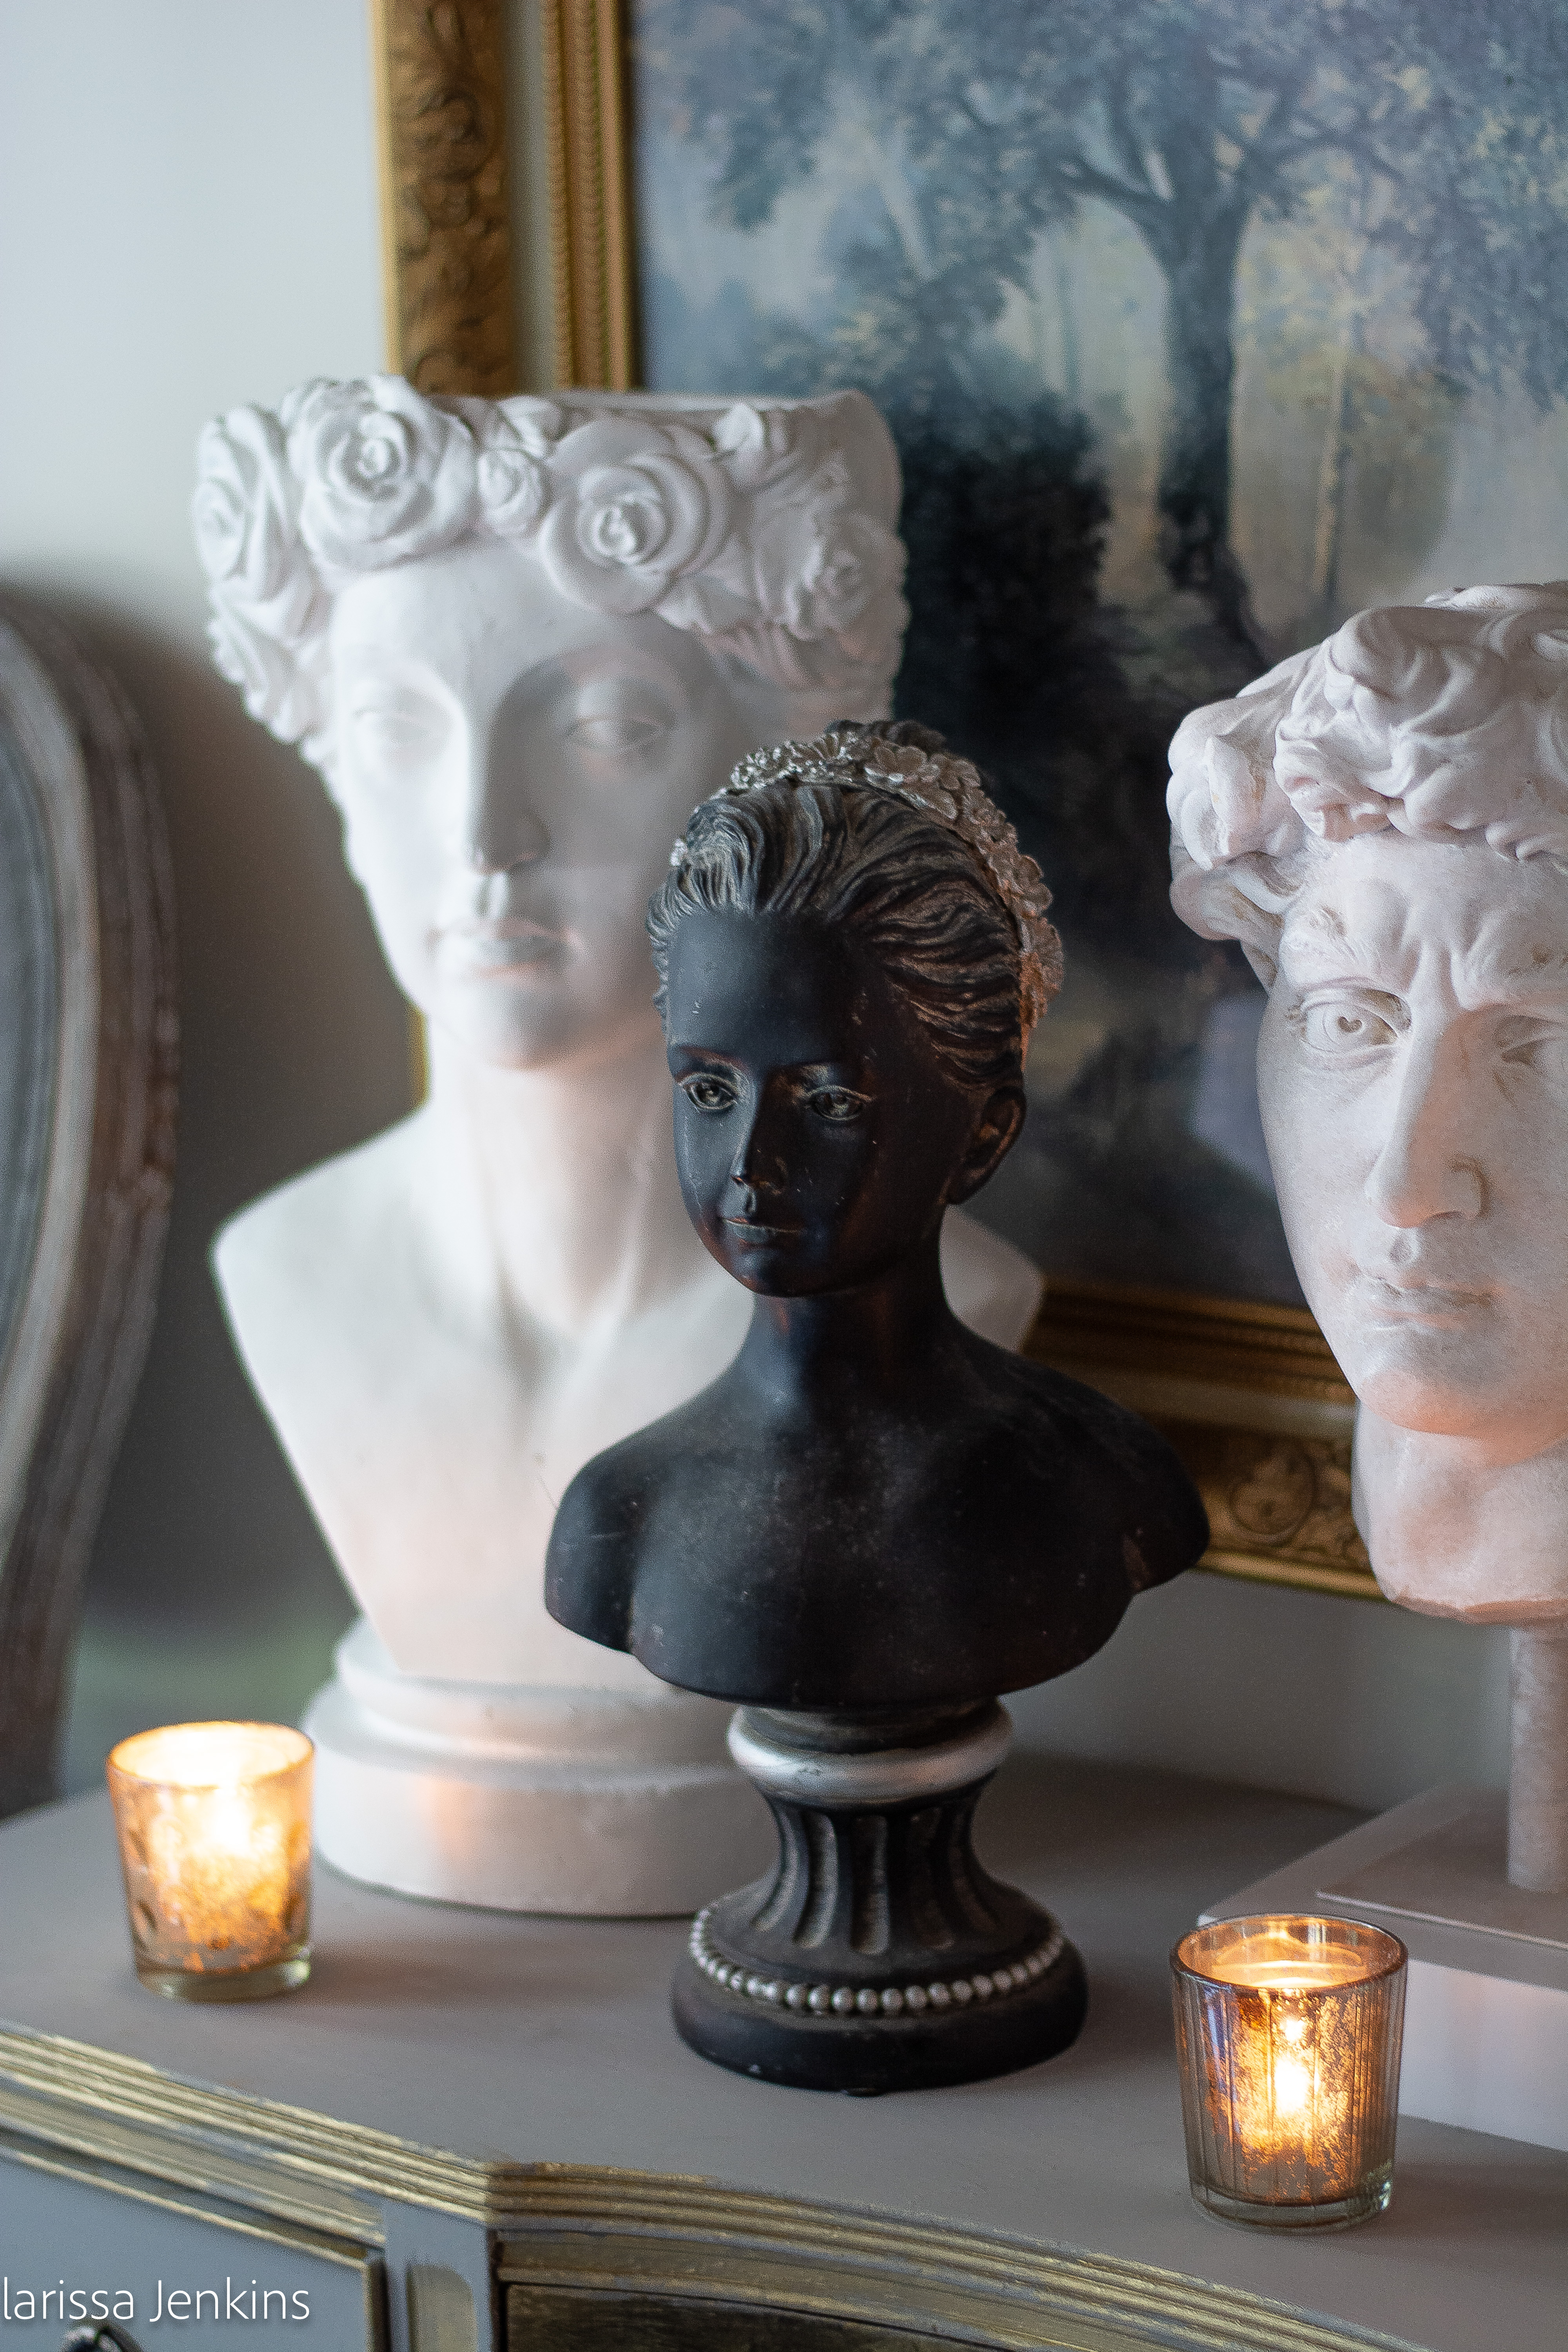
The two busts on the ends were Christmas gifts from my Husband and Son. I love them, but they are just too white in my opinion.


I started on this lovely bust first. I bought her years ago from Hobby Lobby. First I gave here two coats of  of the Basswood paint. Look how amazing she already looks with the new color going on!


Once that color is dry, I started painting on Sherwin Williams "Egg White". This second color I painted on messily and almost in a dry brush type of way. I left some areas with the first paint color showing through.


In  DIY reel, the last step was to do a coffee wash all over the statue. I didn't have any coffee, but I did water down some dark wax that I brushed over some of the statues but not all. It's really just your personal preference, I think they look just as beautiful with just the paint alone.


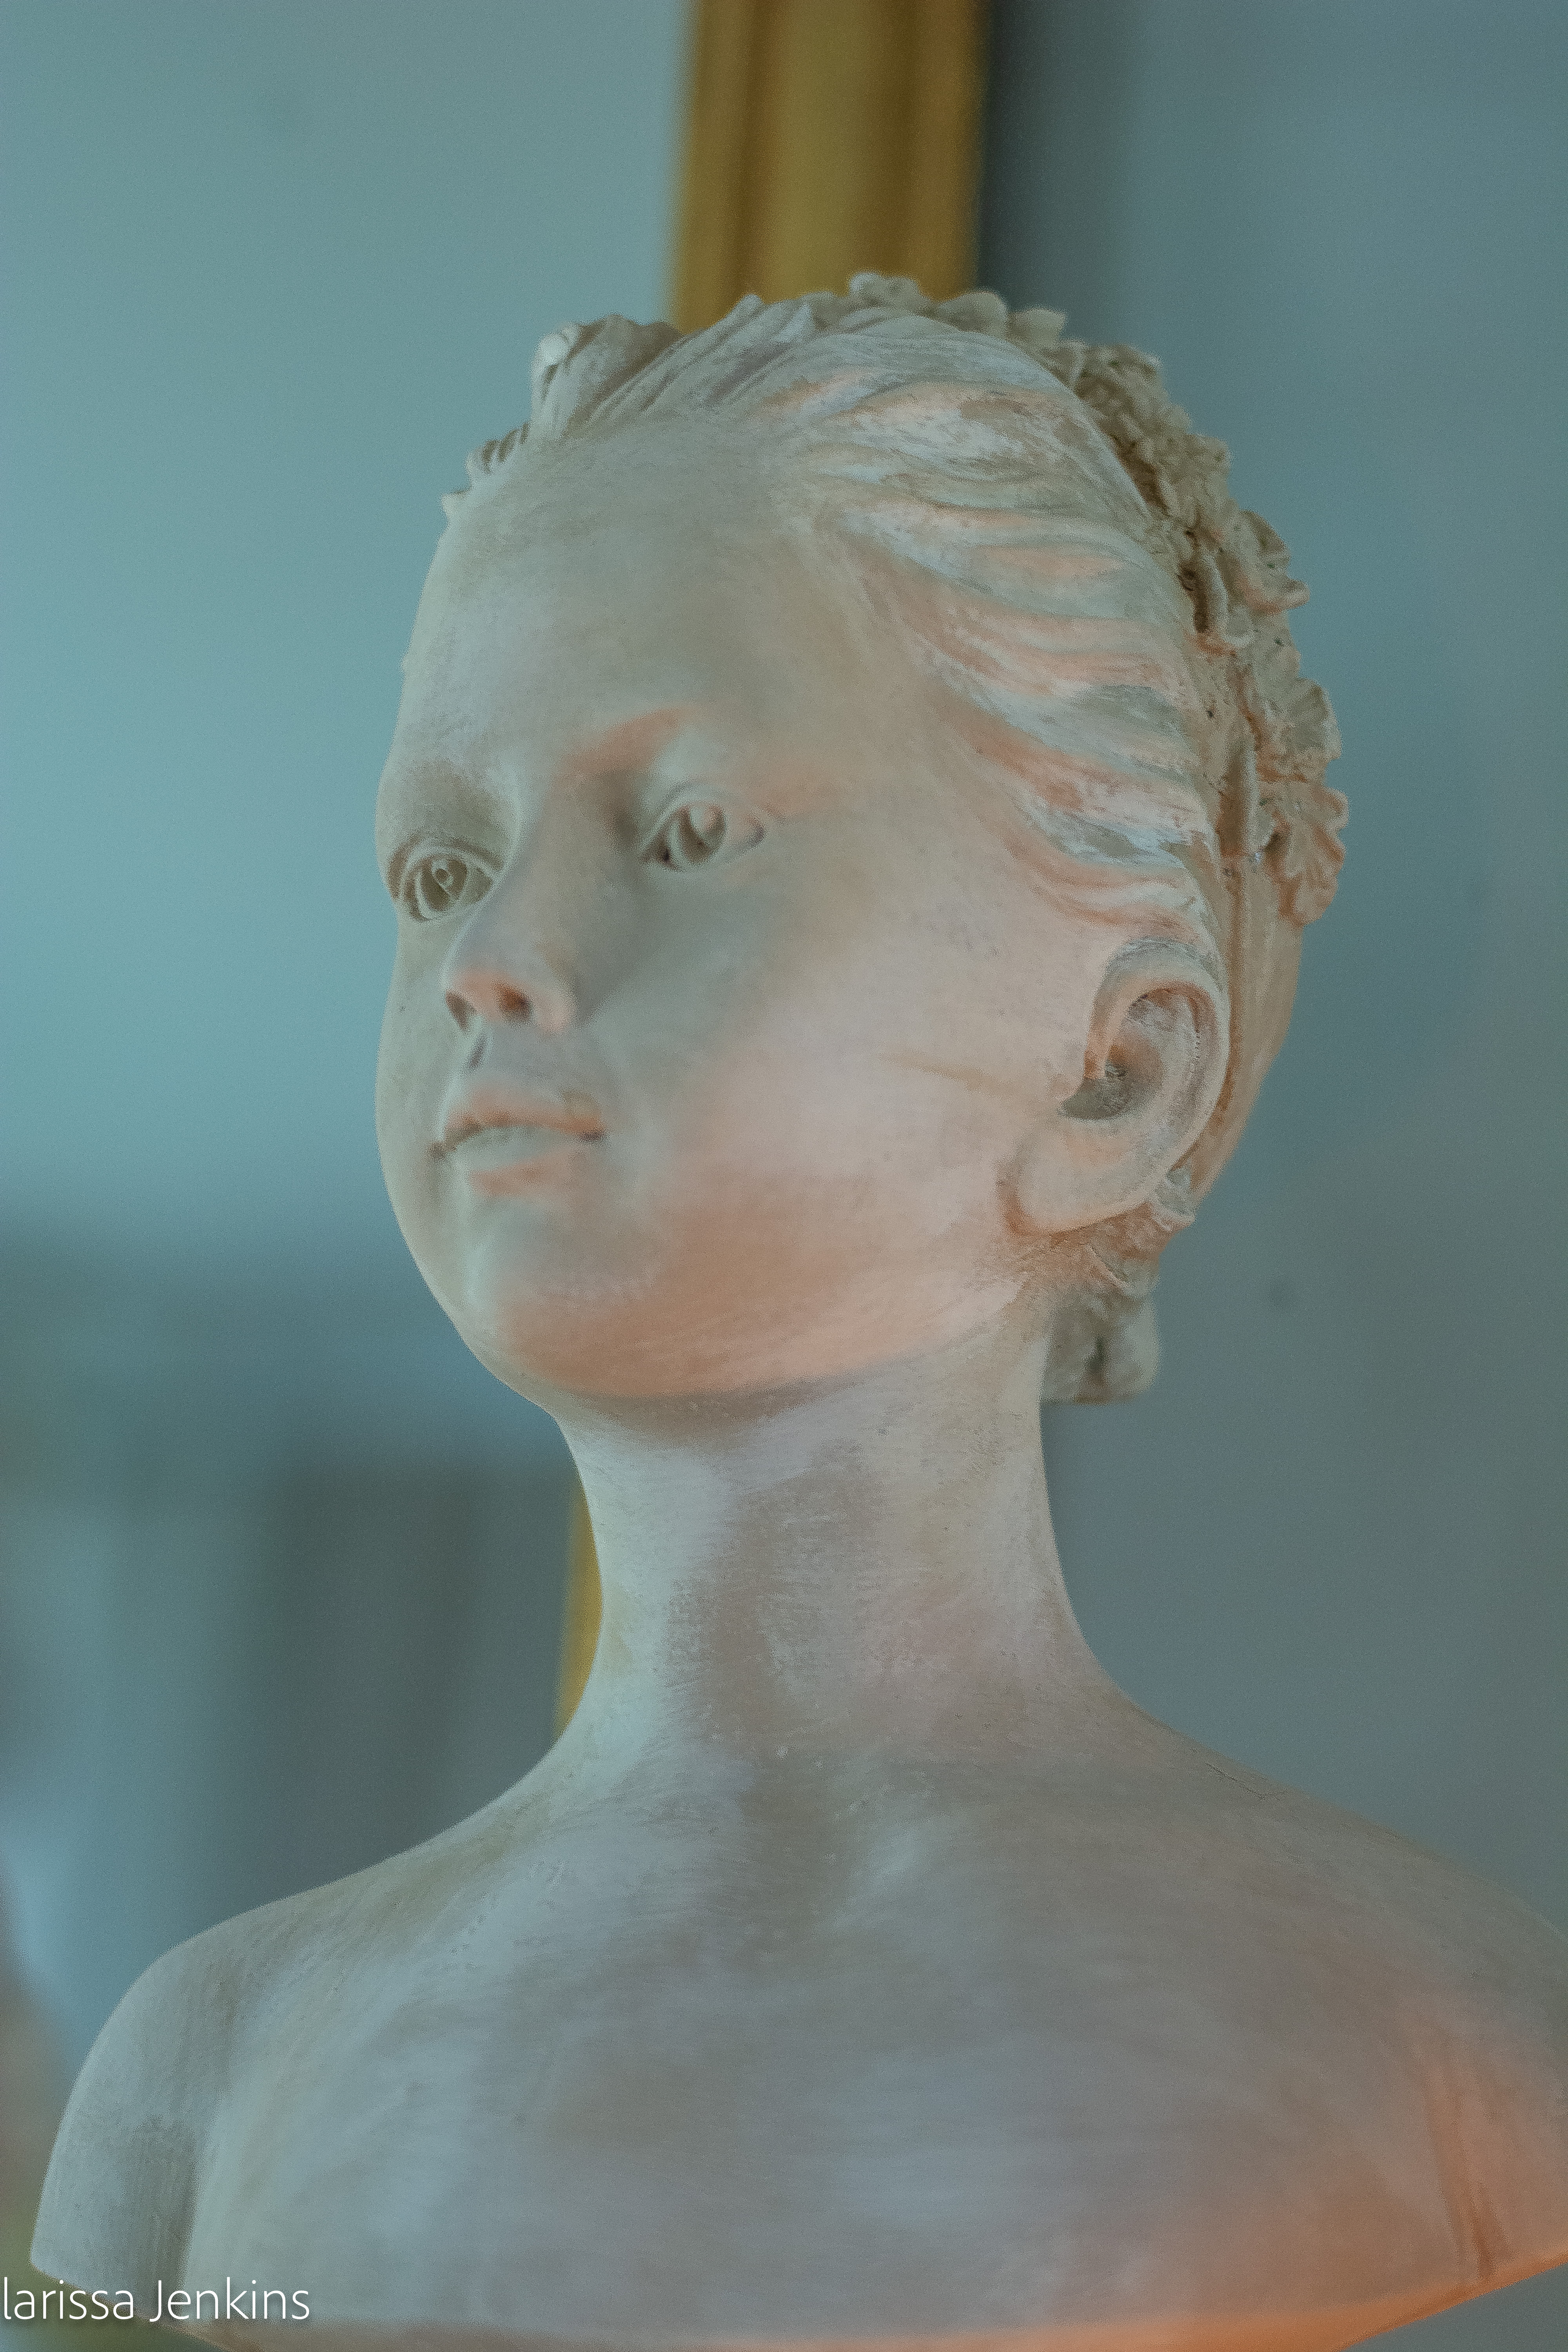
Remember my all white Apollo bust from before? Here he is with his old world patina paint job. 


I love his profile.


I decided to group some of my statues on the mantel to really see the results. I did not paint the Apollo bust on one end  of the mantel (I have two Apollos) and the Artemis statue on the other end. I love their natural patina already and I am delighted with how well the others look grouped beside them.


 This little statue of either Artemis or Aphrodite turned out so well!!! I just love her now. I couldn't remove her floral decal, but the paint went on right over it, and you can't even tell it was ever there.


I'm also very happy with the black Hobby Lobby bust's transformation. So much better! I was very nervous to paint her, but I'm so glad that I did.


I think they all look so nice grouped together now that the patinas are so similar. I love to display my bust collection together each year for Halloween. They are always adorned with venetian masks and a flock of black crows. This year I think the group with look even better with the new paint job.


This bust I just purchased from Home Goods. I didn't like the the areas with the terra cotta paint showing through.


She turned out lovely!


This was such a simple and fun project! I really encourage you to go for it if you have a statue or bust with a paint job you don't love. You honestly can't mess this up.


Had to snap a photo of one of my newest roses in the garden. This is Eustacia Vye, a beautiful pink sherbet  colored rose from David Austin roses. I had to pick it because I noticed the Japanese beetles have arrived. They already destroyed  quite a few buds on my Olivia rosebush, so I rescued this bloom before it got ruined.


Thank you so much for visiting! I hope your summer is going well! Ours is just flying by!

-Larissa

DIY Vintage Refrigerator Magnets

 Recently as I was scrolling through my instagram, I came across a really fun reel by @homeliving5 showing a fun DIY that involved taking vintage prints and turning them into magnets for your refrigerator! I quickly saved it to my favorites and then to my surprise a few people actually sent me the same video in my instagram dm's thinking that I would love this project, which I did!


I had plenty of old gorgeous vintage prints in delicate frames laying in piles around the house waiting for me to find a home for them. 


I was so exited to finally find a place for these beauties and transform my refrigerator into a work of art...or maybe an art gallery.


I did have a few frames hanging around that were empty and I knew that I wanted to use those too. Years ago I wallpapered a room in my house with bible pages, I still had the old bible and I knew there were lots of beautiful prints inside.


It was fun turning the crinkly pages and finding the perfect prints for each frame.


This little print featuring three children carrying florals was absolutely darling and was a perfect fit for this frame.


This square frame felt more masculine, so I added a depiction of Cain and Abel.


I ordered a roll of Magnet adhesive tape from amazon. You can find the link here.


The process was extremely easy. Just cut the tape to your desired length, peel off the backing, and lay the sticky side down on the back of your frames.


Some examples....very easy.


Now, here are some real life photos. My husband and I have been married 17 years, and in all of those years we have never had a new refrigerator until recently, and I adore it! The stainless steel is black and the best part is the handles! Gold! My favorite color!


When we brought it home, I said that absolutely under no circumstances were we ever going to junk up the front with papers, receipts ect. Lol well I guess life happens and here it is in all its glory. Geez....

Anyways I stripped the fridge of all the unecessary paperwork and ta-da!


 The refrigerator has been transformed into an art gallery!


Well...not quite, but the vintage artwork magnets do make it look even prettier in my opinion.


I will probably be adding a few more frames when I come across them because the refrigerator that I saw on Instagram had even more magnets than mine, and it looked amazing!


 My son's artwork will always have a spot on my art gallery refrigerator. The painting of his that I just took down, I ended up framing and hanging it in the toy room. I'm sure that once school starts he will be bringing some more works of art home! 


In other news life has been so busy! So many projects over here! The kitchen is one of them, I can't wait to show you before and afters, but we are not done. You can see in the first photo that we just installed a beautiful new window but have no molding around it yet. Right now we are working a lot on the outside of our home as it is finally getting painted, so the kitchen has been neglected for right now.


I also finally made myself purchase a new computer because the old one was just not working anymore and I wasn't able to blog. I am not good with technology and honestly it is taking some time to figure everything out again! I haven't picked up my camera in 6 or 7 months so even that was an adjustment.


I will try to be more present on here but I am most active on my instagram especially in my stories, so definitely check me out over there too!

I've missed you all! 

-Larissa